Continues from Part 3.
Next step: feet
 ..
Nikolai’s feet (as well as hands) are a little larger than 1:6 scale, because he is a troll.
In order to have the tie down threaded holes in the right places I had to add one more joint to each foot.
Here is the hardware: foot pads, M3 threaded rods, M3 threaded balls, compression plates<img src=", joint+screws, brass connectors, 5/32″ square brass tubes
 .

To test them, I made a small tie-down stage.
wood square cutout, M3 screws, nylon standoff connectors.
 .
 .
 .
 .
 .
 .
Ports for heel tie-downs are made out of M3 T-Nuts
 .
 .
 .
Instamorph Moldable ThermoPlastic (more information how to use it can be found here (towards the bottom).
 .
 .
 .
 .
 .
 .
Starting the clay prototype for the mold.
 .
 .
clay rollerand blade to make thin layers of clay to gradually build to the needed shape.
 .
 .
 .
 .
 .

sculpey smoothing oil and cat tongue clay smoothing brush
 .
 .
 .
 .
 .
 .
 .
 .
 .
 .
 .
 .
Baked.
 .
 .
Next – making the mold. I am going to make a 3-part hard mold, as an experiment.
Chavant sulphur-free plasteline.
 .
 .


 .
 .
clay roller and blade to make the plastiline mold bed.
 .
 .
 .
 .
 .
 .
 .
 .
 .
 .
Hydrocal white gypsum cement plaster
First part of the mold
 .
 .
First part of the mold
 .
 .
Ease Release and disposable brush
Second part of the mold
 .
 .
 .
Third part of the mold.
 .
 .
 .
 .
 .
 .
The mold is ready.
 .
 .
 .
 .
Covered with sewing thread, to make silicone stick. The thread was barely sufficient, I wish I did it the other way – glue the stretch foam with Fabritac on the armature, like I did on silicone hands. With the thread I can feel the armature move a little bit inside the silicone, stretch foam prevents that completely, because it soaks the silicone and makes it stick to the armature. Will remember next time.
 .
 .
 .
 .
Platsil gel 10 silicone rubber with a bit of blue acrylic paint.
 .
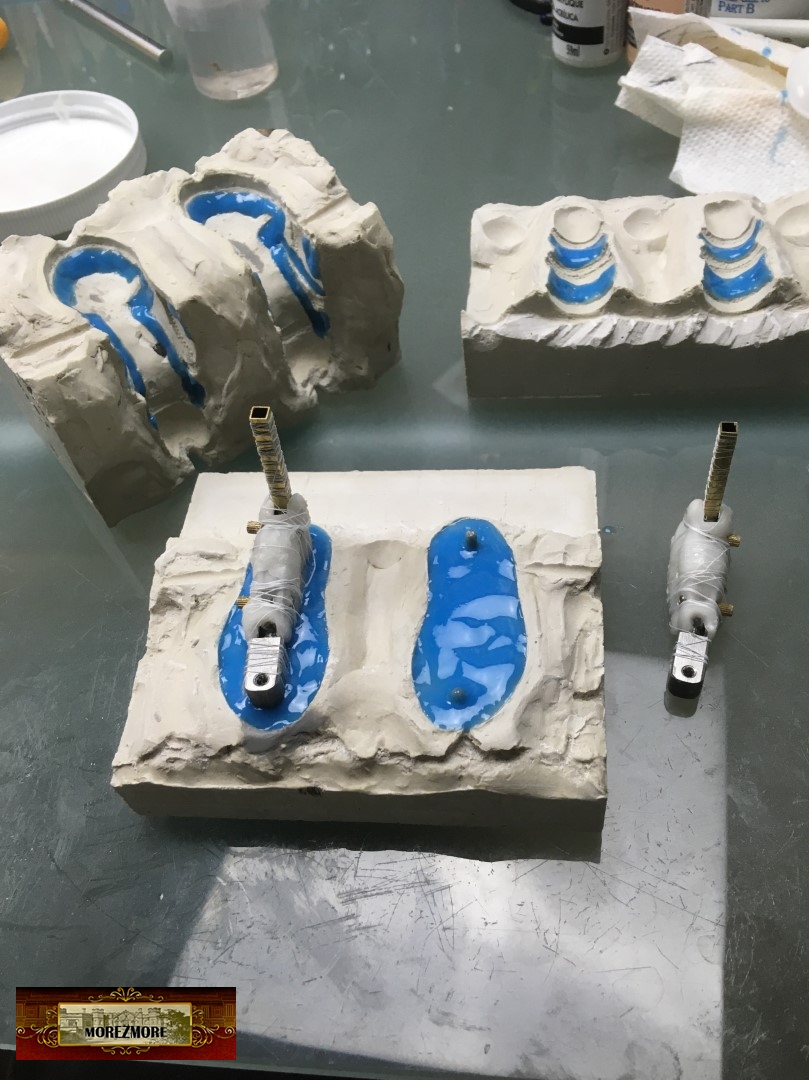 .
After the blue silicone details are cured, mix Platsil gel 10 with a bit of white acrylic paint. Paint a thin layer first, bubble-free skin.
 .
 .
Assembled 2 parts of the mold, tied with rubber bands, filled the cavities with a fresh batch of white-tinted silicone, closed the mold with the 3rd part.
 .
 .
Cured and demolded.
A lot of my tiny sculpted details on the shoes did not work out, but overall it worked.
 .
 .
 .
 .
 .
 .
 .
 .
1mm chinese satin cord for laces
 .
 .
white tubular gauze for socks
 .
 .
Tucked in with this Hair Tool and sewn in with white thread.
 .
 .
Dust with pastelsto make them look dirty.
 .
 .
 .
 .
 .
 .
 . .
Continues on Part 5.
Thank you, to be continued…
[…] from Part 4. Next step – padding and clothes. Padding was done and redone – so you will see 2 […]
[…] Thank you. Continues on Part 4 […]